Sunday, March 24, 2013

More Gelli girl

I love it when the idea pans out. ESPECIALLY during a class or demo! Like I said in my previous post, I was working for 4 hours, and never once cleaned off my Gelli plate. Or brayer. Which was developing a skin! I had to stop myself from 'peeling' it off like old nail polish.... BUT I digress....


POINT BEING, there is quite a bit of residual paint on the plate from previous prints.
I used a 12x12 Crafters Workshop stencil called Botanicals. Brushed paint into the open are of the stencil, removed the stencil & pulled my print.

I was limited to paint colors this day. Red, Yellow, 2 blues, white, black, 2 ochre like colors, and a very deep purple. The orchre and yellow with the deep blue, created the greens. I knew that was going to happen (really, I did).
This is a second generation print.
What I find ESPECIALLY when I'm demoing and yapping away, the paint is drying on the Gelli plate. So now I keep a mister of water handy & I spritz the paint, wait a bit to let the paints rehydrate and pull another print. I've gotten some really cool prints using this method!

- Posted using BlogPress from my iPhone

Getting my Gelli Girl on!

I was so THRILLED to demo the Gelli Art's Printing plate again at Artist and Display for their 2x a year Make Your Mark event! Always a great time!

I worked with the Gelli plate, Golden Acrylics, Catalyst Tools, The Crafters Workshop Stencils, some homemade die cut stencils, rubber stamps and other mark making 'tools'. Buttons, bubble wrap, punchinella, a credit card.....
For the most part, I used Mixed Media paper by Strathmore, which I love, tags, canvas cloth and a tee shirt.

Over the course of 4 hours, I made a TON of prints, but I'm just going to post some of my favorites!

With this piece, I used Akua Printing Inks (by Speedball). The red & yellow are the Akua. I used a rays stencil (not sure of the real name), brushing in the yellow & red. There is A LOT of residual paint that popped thru the teal , but love how that just adds so much depth!  

This is the second generation print. You can see how strong the Akua paint is!
 
I just love this piece. It is SO cool in person, if I do say so myself!
I wish I would have taken a picture of the Gelli plate, but that's tough to do when you're demoing to a crowd, and you're hands are full of paint!
After the previous prints I pulled, I had again, had residual paint. I demoed for 4 hours and never once cleaned the paint off the Gelli plate. Or the brayer, paint brushes or tools. I just cleaned up stencils along the way. SO, with this print, I basically made marks with paint (white teal yellow black) and 'tools' like bubblewrap, a button, mesh... Then laid the stencil down & brushed some paint into the open areas. Removed it and pulled this great print!
 
The residual ink from that printing was used on the tag below.
 

This tag, started out as a piece, that was a 2nd generation print, that really didn't have a lot going on. It 'needed' layers & depth. So while working on the RAYS piece above,

I used residual paint remaining on the Gelli plate, to add depth. I introduced one of the newer CW stencils as a mask to the plate (Sally Carly), and brushed black paint around it.

Removed the mask, and wa-la! I LOVE this one!


Here's a little close up. You can see the red rays, and all of the pattern from previous Gelli prints.

Posted using BlogPress from my iPhone

Sunday, March 17, 2013

Happy St. Patty's Day!


May your blessings be many and your troubles be few,

May you find in your pocket,

a shileleigh or two.


- Posted using BlogPress from my iPhone

Thursday, March 14, 2013

More owls

Just digging this die! I have so many backgrounds made from stencils and Gelli prints! This fish scales stencil is a perfect look for the owl!


I made a card on an chicken wire like embossed stock and Washi tape.

- Posted using BlogPress from my iPhone

Tuesday, March 12, 2013

Hooty who!!!

I'm loving this new Sizzix die, Owl#2 (557694)!


I used background papers I made using sprays, stencils, stamps and The Gelli Print plate!


This guy I cut into a side opening card!


- Posted using BlogPress from my iPhone

Tuesday, February 26, 2013

Getting my Gelli Girl on with the Umbrella man….

IMG_2406


Sassy! This turned out as a ‘finished’ (more or less) piece right off the Gelli plate!

I had made a stencil AND a mask from the Umbrella Man Die by Tim Holtz & have used the pieces on numerous Gelli prints. I die cut it using stencil material by The Crafters Workshop. You can by 12x12 sheets of their very material!


The word IMAGINE was done using another Tim Holtz Movers & Shapers die, cut out of Co-ordinations cardstock. The cut piece was a little boring and needed some paint anyway, so a perfect use!


I also used a piece of punchinella, which is where the fun bubble design on the Umbrella man comes from.


I laid the cut stencil onto a mildly clean (ok, there's some residual paint) Gelli plate.

I used my brayer to ink his hat & shoes black, the umbrella red and a bad mix of deep green & blue for the rest of him…

I then covered the stencil with the punchinella & brayered white over the top of the Umbrella man.


The cardstock IMAGINE, I laid face down onto the Gelli plate, and then brayered red paint onto the backside, trying to keep the paint inside, where the letters were. You can see the texture of the cardstock surrounding the word.


Since the brayer had cool design from the white brayered punchinella, I ran that around the plate slightly to frame the piece.

I removed the stencil & puncinella, then I did laid my clean white cardstock onto the plate & pulled it off.

The color on the right was from a second pressing into Distress Stain I had put on the Gelli plate from another pressing. It just added a little color to the edge.


IMG_2407

IMG_2403

These 2 were done using residual paint & pressings from other inkings.

Mono Printing with the Gelli Plate & Embossing Folders

I JUST LOVE this technique. Now, I’m not saying I made this up (but maybe I did), but I haven’t seen it done elsewhere. Yet. So if you’ve seen this before, let me know. Otherwise, I’m coming up with a cool name for this technique. For now, we’ll just consider it an embossed mono printing technique.


So, if you’re like me, when you get a new die or embossing folder, you’ll run cut or emboss SEVERAL pieces with no real purpose other than to try it out. I have folders FULL of these (you’d think I could actually get a completed piece of work done with this stash). I grabbed 2 that had a great design & depth. The Subway Texture fade from Tim Holtz and the other one by Sizzix. I’ll also include the Honeycomb.

I brayered acrylic paints onto my Gelli plate, and laid the pre-embossed (using tan Co-ordinations cardstock) piece into the paint.

IMG_2395

LOVE LOVE LOVE the look of this!

I can see doing this, A LOT. The finish from the paint (and I BET the new Distress Paint will work REALLY cool too) gives this a semi glossy finish, and will create a great resist to some additional inking with Distress Inks or Stains. It will also help keep the embossing raised when using additional wet mediums.

IMG_2366 IMG_2367

Above is the Gelli plate, after the embossed piece was pulled. (note to self, place a piece of white cardstock underneath for pictures). Because the Sizzix Texture Fades have such great depth, the text & design pulls so well, making for a great ghost print! I LOVE that the text WILL BE rightside facing in the final print. 
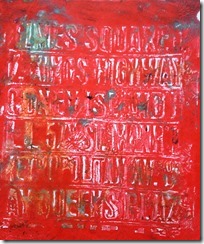
IMG_2396    IMG_2369 

TA Da!!! The image on the left is the print, onto white 110# cardstock. The image on the right, shows both the ‘print’ and the original embossed piece from the first press together.

Now there was a lot of paint on my Gelli plate, because I hadn’t done a print prior to putting the embossed piece in. Therefore, there was still quite a bit of paint for the 2nd print. The words are  distinguishable, and there is some white space.

What a great background this makes!!!!


Now this time, I had some paint left on my plate from a previous pulling, before I laid the embossed piece onto the Gelli plate.

IMG_2370

This is one reason why the cardstock piece on the right of this image, doesn’t have as much paint on it as the Subway piece in the first experiment.

You can see on the left side, the design on the Gelli plate, produced by the embossing folder.

Pretty sweet!


IMG_2371

This image shows white cardstock pulled off the Gelli plate, transferring the embossed design.

You all are going to L*O*V*E doing this!!!!!!!


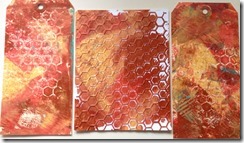
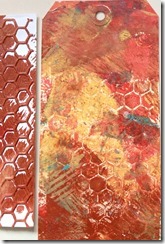
These tags was done using the Honeycomb Texture Fade.
IMG_2392

The white piece in the center was the original embossed cardstock. The tags are the pulled pieces.

See what I mean? VERY COOL backgrounds!!!
IMG_2393

Loving the idea? I know I am.

I can’t wait to work with some of the other embossed pieces I have just waiting for me!


I have a 6x6 Gelli plate, and am finding this to be a great size to work with for what I do. The paint stays pretty wet for the amount of time I need. While working with the 8x10, which again is a great size, the paint dries up a little quicker. I notice the difference.

Getting my Gelli Girl on!


After spending a fun afternoon demoing the Gelli Arts Printing Plate at Artist & Display recently, I felt inspired to experiment through some ideas I had the next day.

One thing I HAVE to do, is finish up a tag for a Snowflake swap. I used the Catalyst tool to scrape paint onto the Gelli plate vs using a brayer.

Paint Scrapping

Next I laid out stencils from Tattered Angels. These stencils are thicker & stiffer than some other brands, so you get some ‘bleed’ underneath. Not problematic, just adds to the look.


 IMG_2355

I pulled 2 tags off the plate as first generation prints.

I ran some white acrylic completely over the top of the plate, and pulled 2nd generation prints, which I like better.

IMG_2356   IMG_2357

These are the results showing the differences.

IMG_2358  IMG_2378

This is one of the more ‘finished tags’. Well, finished with the Gelli plate anyway!

IMG_2379

With this tag, you can see some of the stenciling from the first generation print above. I just couldn’t let them bee with the white space earlier, and am much happier with this tag.

IMG_2381

This experiment was done using a stencil from The Crafters Workshop & Airbrush acrylic paint in magenta & Fluid acrylic, both by Golden.

IMG_2384 

IMG_2382

The right side of this shows the first generation print, and the left side is a 2nd generation. I only used 2 colors, and really like the way the paint blended & flowed under the stencil.

I like the way the fluid paint moved around & created some resist with the Gelli plates surface. I don’t have a lot of airbrush paints, but do like the look. These are done on 110# cardstock, but I imagine if done on Mixed Media (Strathmore) or Bristol the ink would move a bit more.


The great thing about stencils, is the ability to flip words so the orientation in the final print comes off right!

IMG_2401IMG_2402

After making the 1st & 2nd generation prints, there was still plenty of paint to add lettering to several other tags. No paint left behind!

Watch for the next post. I ended up with some pretty unique ( at least in my mind) prints!